
How to Enable or Disable PHP's allow_url_fopen Using CloudLinux Selector in cPanel
You can use CloudLinux Selector to enable or disable the allow_url_fopen directive in cPanel. 1. Log in to your cPanel account. 2. In the Software section, click on Select PHP Version. 3. Click on the Options menu. Note: If the Options page shows an error related to the native PHP version, change...
How to Enable or Disable PHP Extensions Using the CloudLinux Selector in cPanel
You can use CloudLinux Selector to enable or disable available PHP extensions in cPanel. 1. Log in to your cPanel account. 2. In the Software section, click on Select PHP Version. 3. Click on the Extensions menu. Note: If the Extensions page shows an error related to the native PHP version, chang...
How to Enable the Mailparse Extension of PHP Using CloudLinux Selector in cPanel
You can use CloudLinux Selector to enable the Mailparse extension in PHP via cPanel. 1. Log in to your cPanel account. 2. In the Software section, click on Select PHP Version. 3. Click on the Extensions menu. Note: If the Extensions page shows an error related to the native PHP version, change it...
How to Enable the GD Extension of PHP Using CloudLinux Selector in cPanel
You can use CloudLinux Selector to enable GD extension in PHP via cPanel. 1. Log in to your cPanel account. 2. In the Software section, click on Select PHP Version. 3. Click on the Extensions menu. Note: If the Extensions page shows an error related to the native PHP version, change it to a non-n...
How to Enable ionCube Loader Using CloudLinux Selector in cPanel
You can use CloudLinux Selector to enable ionCube Loader in cPanel. 1. Log in to your cPanel account. 2. In the Software section, click on Select PHP Version. 3. Click on the Extensions menu. Note: If the Extensions page shows an error related to the native PHP version, change it to a non-native ...
How to Change the PHP Version via CloudLinux Selector in cPanel
You can use CloudLinux's Select PHP Version to change your website's PHP Version. CloudLinux provides various PHP Versions to choose from. 1. Log in to your cPanel account. 2. In the Software section, click on Select PHP Version. 3. To the right side of the Current PHP version, click on the drop-...
 Tutorial
How to Disable Rescue Mode in Virtualizor
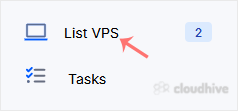
If you have previously enabled rescue mode but did not know how to disable it, follow this tutorial. 1. Log in to your Virtualizor Control Panel. 2. From the left side panel, click on List VPS. 3. Hover your mouse on the appropriate VPS, and that line will be highlighted. Then click on the Wrench...
Security
How to Start VPS in Rescue Mode Using Virtualizor
Rescue mode can be used for data recovery, OS repair, etc. You can enable rescue mode on your VPS. Please, follow the below steps. 1. Log in to your Virtualizor Control Panel. 2. From the left side panel, click on List VPS. 3. Hover your mouse on the appropriate VPS, and that line will be highlig...
Tutorial
How to Delete the Self-Shutdown Timer in Virtualizor
You can remove the self-shutdown timer in Virtualizor. Please, follow the steps below to remove the self-shutdown timer. 1. Log in to your Virtualizor Control Panel. 2. From the left side panel, click on List VPS. 3. Hover your mouse on the appropriate VPS, and that line will be highlighted. Then...
Tutorial
How to Edit the Self-Shutdown Timer in Virtualizor
You can easily edit the self-shutdown timer in Virtualizor. Please, follow the steps below to edit the self-shutdown timer. 1. Log in to your Virtualizor Control Panel. 2. From the left side panel, click on List VPS. 3. Hover your mouse on the appropriate VPS, and that line will be highlighted. T...
Tutorial
How to Set Self Shutdown/Start/Reboot Timer for Your VPS in Virtualizor
Do you know that you can set a self-timer for the VPS to start/shutdown/reboot or Power off at a specified time? This is a handy feature provided by Virtualizor. 1. Log in to your Virtualizor Control Panel. 2. From the left side panel, click on List VPS. 3. Hover your mouse on the appropriate VPS...
Security
How to Change the VNC Password in Virtualizor
You can change the VNC password using Virtualizor. 1. Log in to your Virtualizor Control Panel. 2. From the left side panel, click on List VPS. 3. Hover your mouse on the appropriate VPS, and that line will be highlighted. Then click on the Manage icon in the highlighted line. 4. Click on Setting...