
How to Change the VNC Password in Virtualizor Security

How to Change the VNC Password in Virtualizor

You can change the VNC password using Virtualizor.

1. Log in to your Virtualizor Control Panel.

2. From the left side panel, click on List VPS.

3. Hover your mouse on the appropriate VPS, and that line will be highlighted. Then click on the Manage icon in the highlighted line.

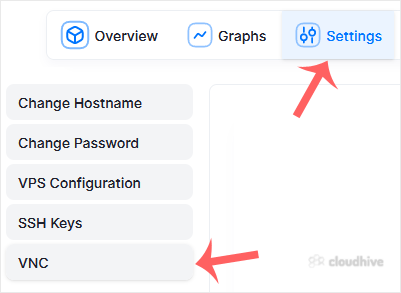
4. Click on Settings and then on VNC.
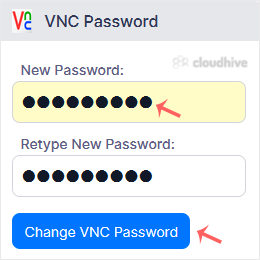
5. Enter your new password, and confirm with Change VNC Password.
6. Reboot your VPS. Now, you can access VNC with your new password.

We hope you found this tutorial helpful.

Share: Twitter LinkedIn WhatsApp

Expert Knowledge

Articles written by certified WHMCS developers and hosting professionals.

Regularly Updated

Fresh content published regularly to keep you up to date with the latest.

Community Focused

Content built around real questions and challenges from our community.

Actionable Tips

Every article includes step-by-step guides you can apply immediately.