
How to Disable Rescue Mode in Virtualizor Tutorial

How to Disable Rescue Mode in Virtualizor

If you have previously enabled rescue mode but did not know how to disable it, follow this tutorial.

1. Log in to your Virtualizor Control Panel.

2. From the left side panel, click on List VPS.

3. Hover your mouse on the appropriate VPS, and that line will be highlighted. Then click on the Wrench icon in the highlighted line.

4. Click on Rescue Mode.

5. Click Disable Rescue Mode.
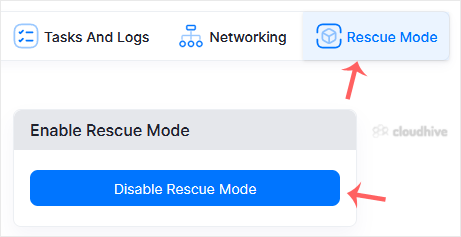
Your VPS will start in normal mode.

Share: Twitter LinkedIn WhatsApp

Expert Knowledge

Articles written by certified WHMCS developers and hosting professionals.

Regularly Updated

Fresh content published regularly to keep you up to date with the latest.

Community Focused

Content built around real questions and challenges from our community.

Actionable Tips

Every article includes step-by-step guides you can apply immediately.