
 Tutorial
How to Check VPS Specifications and Virtualization Info in SolusVM 1
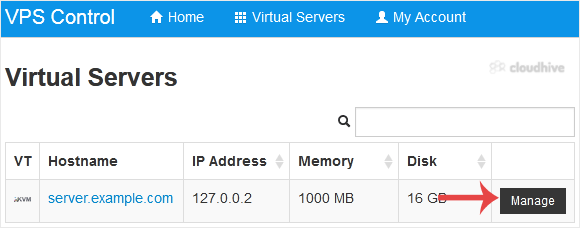
You can check VPS specifications such as RAM, disk space, virtualization, IP Address, etc., from the SolusVM 1 Control Panel.1. Log in to your SolusVM 1 Control Panel. 2. If you have multiple VPSs, select the appropriate one.3. Under the VPS hostname, you can see VPS specifications like the IP ad...
cPanel
How to Check VPS Online or Offline Status in SolusVM 1
You can check your SolusVM VPS status and determine whether the VPS is offline or online. You can find out VPS status from the client area or from the SolusVM 1 Control Panel.1. Log in to your SolusVM 1 Control Panel. 2. If you have multiple VPSs, select the appropriate one. 3. Under the VPS host...
 cPanel
How to Log in to SolusVM 1 Control Panel
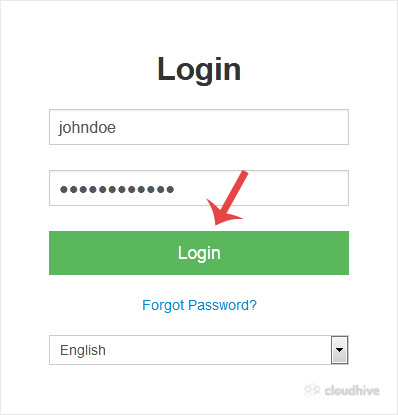
You can find the Control Panel URL, username and password in your VPS welcome email. SolusVM 1 Login details example: Control Panel URL: https://cp.example.com or with the IP Address.Username: vmuser123 or johndoe.Password: example. How to log in to SolusVM 1 Control Panel? 1. Open VPS Control Pa...
 cPanel
How to Set the PHP Version per Directory in cPanel
Do you want to use different PHP versions per directory? You can do this using cPanel and the dot htaccess file.1. Log in to your cPanel account. 2. In the Software section, click on MultiPHP Manager.3. The first thing we need to do is to get the code generated by cPanel.4. Scroll down to the bot...
cPanel
How to Set the PHP Version per Domain in cPanel
In this article, we will demonstrate how to use cPanel to set different PHP versions for individual domains. This can be beneficial, as some applications require specific versions to function correctly. For example, we will set PHP 8.3 on the Example2 domain and PHP 8.1 on the Example1 domain. 1....
cPanel
How to Reset the PHP Version to the Default Version in cPanel
If you want to reset the PHP version to the default version, follow these instructions:1. Log in to your cPanel account. 2. In the Software section, click on MultiPHP Manager.3. Scroll down to the bottom of the page. Select your domain from the left side of the screen. You can view the PHP Versio...
cPanel
How to Change the PHP Version on Your Domain in cPanel
Some software requires a different version of PHP. You can switch the PHP versions using cPanel. 1. Log in to your cPanel account. 2. In the Software section, click on MultiPHP Manager.3. Scroll down to the bottom of the page. Select your domain from the left side of the screen. You can view the ...
 cPanel
How to Disable the Two-Factor Authentication on Your cPanel Account
Follow this instruction to remove two-factor authentication from your cPanel account. 1. Log in to your cPanel account. 2. In the Security section, click on Two-Factor Authentication. 3. Click on Remove Two-Factor Authentication. 4. For confirmation, click on Remove. It should show a message such...
cPanel
How to Enable the Two-Factor Authentication on Your cPanel Account
Security is important for our data safety. We recommend you to enable the Two-Factor Authentication (2FA) on your cPanel account in order to prevent hackers from accessing your cPanel account even if they have somehow obtained your account details. What are the Requirements? You would need a smar...
 cPanel
How to Enable or Disable Mod Security in cPanel
Are you facing the issue of IP getting blocked repeatedly? If the answer is Yes, then it may have happened due to Mod Security. What is Mod Security? ModSecurity is a module that protects your website from various types of attacks. Mod Security protects a website from hackers, brute force attacks...
 Tutorial
How to Delete Categories in WordPress
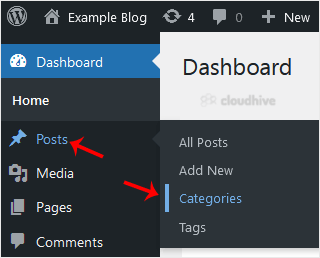
If you want to remove the WordPress category, then follow this instruction:1. Log in to the WordPress dashboard. 2. From the Dashboard menu, go to Posts and click on Categories.3. Hover your mouse over a category you want to remove and click on Delete. The confirmation option will appear. Confirm...
Tutorial
How to Delete an Uncategorized Category in WordPress
You cannot remove the Uncategorized category, but you can rename it.1. Log in to the WordPress dashboard. 2. From the Dashboard menu, go to Posts and click on Categories.3. Hover your mouse on the Uncategorized option and click on Quick Edit.4. Change its name and slug, and confirm with Update Ca...