
How to Change the Default Nameservers in the WHM Root Tutorial

How to Change the Default Nameservers in the WHM Root

You can change the default nameservers in your WHM Root Account.


Note: Root access is required. You cannot change the root accounts default nameservers with a normal WHM Reseller account.


1. Log in to your WHM Root Account.


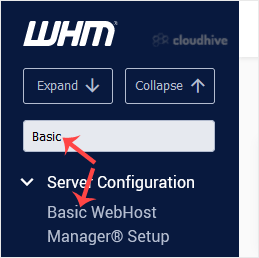
2. Go to Server Configuration >> Basic WebHost Manager Setup or type Basic in the menu filter box. The option will appear. Click on it.


3. Scroll to the end of the page. Under Nameservers, enter your Nameservers in the text field.
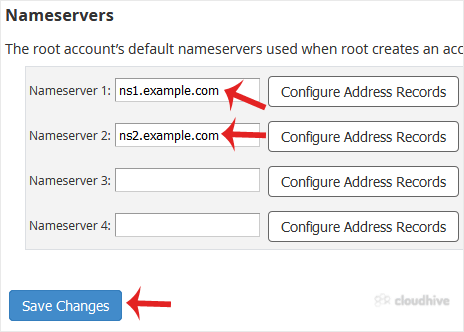


4. Click on Save Changes.


The nameservers will be changed successfully.

Share: Twitter LinkedIn WhatsApp

Expert Knowledge

Articles written by certified WHMCS developers and hosting professionals.

Regularly Updated

Fresh content published regularly to keep you up to date with the latest.

Community Focused

Content built around real questions and challenges from our community.

Actionable Tips

Every article includes step-by-step guides you can apply immediately.