
You can change the hostname in Virtualizor.
1. Log in to your Virtualizor Control Panel.
2. From the left side panel, click on List VPS.

3. Hover your mouse on the appropriate VPS, and that line will be highlighted. Then click on the Wrench icon in the highlighted line.

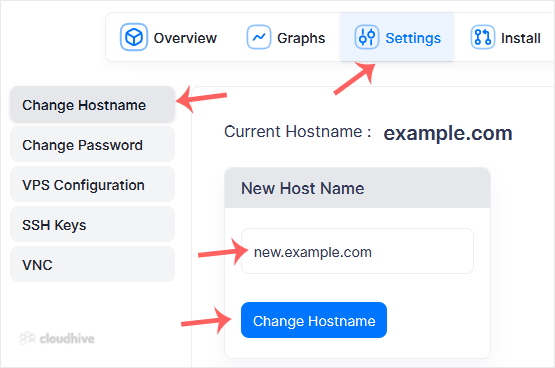
4. Click on the Settings tab and select the Change Hostname. Enter your new hostname and click on Change Hostname.
5. Reboot the VPS to apply the changes.
Your hostname has been successfully changed in Virtualizor. You can now use the new hostname for your server.